Installing DLNA Media Server For Mac & Windows – Stream Media to PS3, Android thru Wi-Fi
I bought a Samsung Galaxy S Mobile last week. Since then i was playing around with it. When I saw my iPad friends using Air Video to stream files from Mac to iPad in Wi-Fi i thought may be have to wait until they release for Android platform. Then i remembered i saw a allShare application in Samsung which showed it can play from server..So is that it?? Googled for it and found that its wat i was looking for.. its called DLNA. the service which can stream media from the compatible DLNA devices otherwise called as uPnP Technology. Samsung Galaxy S is DLNA certifed by default.Yupee.That was superb.
So wats next.. Setting up my mac.. Thats where i told to myself i should have been using Windows 7. Yeah it comes with built-in DLNA you dont have to install any specific softwares for that, Windows Media Centre itself is more than enough. Check MSDN Blog for how to enable DLNA in Windows 7.
Good luck with it but am a mac user i have to find a solution 😛 . Again Google. Got so many softwares for mac still in infancy state and nothing had a good review. so it is our choice to select. There are some paid softwares like Nullriver MediaLink, Eyeconnect. But started using Android, why dont give a try for a Open Source.? Then i landed on something called Serviio and Fuppes.I never got Serviio to work . I needed Java 6 for serviio to work unfortunately Leopard doesnt have Java 6. So I proceeded with Fuppes. So here is how to install Fuppes on mac. Though you can run the windows version using wineBottler but its good to go with the native always. Just follow these steps to install.
- Install Xcode, It will either be on a seperate CD or included on the Mac OS DVD.
- Download MacPorts from http:www.macports.org and install it.
-
To install Fuppes You need to install the dependent libraries first.
- Mandatory Packages – subversion, pkgconfig, pcre, taglib, libxml2
- Optional Packages – ffmpeg, simage, imagemagick, lame, libvorbis, flac, mpeg4ip, faad2
-
Install each these packages with the following command.
$ sudo port install [packagename] -
Download Fuppes distribution from the repository.
$ svn co https://fuppes.svn.sourceforge.net/svnroot/fuppes/trunk fuppesThis will check out the source from SVN to the folder fuppes
-
Now navigate to the folder you checked out Fuppes.
$ cd fuppes -
Execute the following command
$ CFLAGS="-I/opt/local/include -L/opt/local/lib" ./configure --enable-libavformatIf there is an error for missing packages check the list of dependencies and make sure all of them installed. In case if you have them installed some other than dependencies location Change your PKG_CONFIG_PATH Variable accordingly. ( For me it happened for sqlite3 🙂 )
-
Make the executables
$ make -
Install the built files:
$ sudo make install -
So we are done with installation now. To start service just type
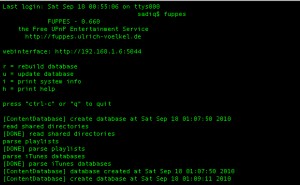
$ fuppes
You should see this screen now.
In case if you see this error message “Cannot bind to the socket” ( i did 😉 ) you might be running other uPnP services same as fuppes try quitting that and run the fuppes command again it should work.
The best thing in the Fuppes is you can configure each and everything as per your need with the fuppes.cfg file.
Stop the fuppes when started first time so that it will create you config in the $HOME/.fuppes/fuppes.cfg with which you can customize everything, for more information on customizing Fuppes.
fuppes.cfg file by default should be in the home folder of your system inside a hidden folder .fuppes. To see the hidden files in your mac execute these commands
$ defaults write com.apple.finder AppleShowAllFiles TRUE

$ killAll Finder
To revert things back to normal change True to False and execute again.
So we have now everything configured lets get this thing to work. Open a browser and type the webinterface given while starting the service in my case it was http://192.168.1.6:5044 (Check the screenshot). You will get the options to add your directories. Add them and give some time to index the directories. All set now. Fire up your allShare application in the mobile. Select Play files from server on my phone. In the following screen you will see your mac listed as a server browse through the folders you added and the enjoy the streaming :). For further reference please refer wiki for Fuppes.
If you dont want to go through all these steps check this one TVMobili i found that simple and powerful.

Nice find Sadiq. I was looking for some tool like this for my linux box, tried lot of ways to do airvideo with wine and all, but really was not able to fix it. I hope this will help me, as i can see a linux version. 🙂
Thanks buddy 😀